
We are not just explaining how the TLS v1.2 handshake protocol works, but we will also decode the TLS v1.2 protocol handshake using Wireshark. There are two main goals of this article: (1) Explaining the TLS v1.2 handshake protocol step by step. (2)Capture and examine a TLS stream in Wireshark.
Just for demonstration purposes, we are going to access Pluralsight’s (public learning platform) website on the chrome browser over a secured HTTPS connection. Because TLS handshake works only in HTTPS communication. The difference between HTTP and HTTPS is that in HTTP, only a TCP handshake will happen, but in the case of HTTPS TCP and TLS, both handshakes will happen.
TCP Three-Way Handshake Protocol:
In HTTP, the TLS handshake will happen after the completion of a successful TCP handshake. TCP handshake process is a separate topic, so we are not covering that in this article. To tell in short, a TCP handshake is a three-step process. First, the client sends the SYN packet to the server. Second, the server sends SYN + ACK in response to the client. At last, the client sends the acknowledgment to the server.

192.168.0.114 is the client machine. 199.38.167.35 is the destination Pluralsight.

TLS v1.2 Protocol Handshake:
Once the TCP three-way handshake is done. The TLS handshake will kick in with client hello.
Step #1: Client Hello
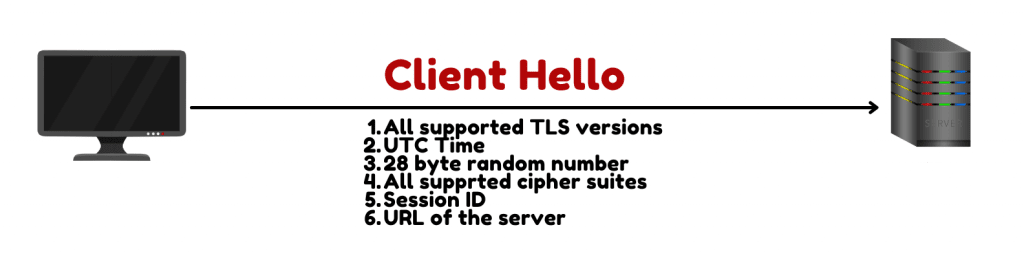
The client sends a client hello message to the server. In the client hello message client sends its supported TLS version, UTC time, 28-byte random number, session ID, URL of the server, and supported cipher suites to the server.
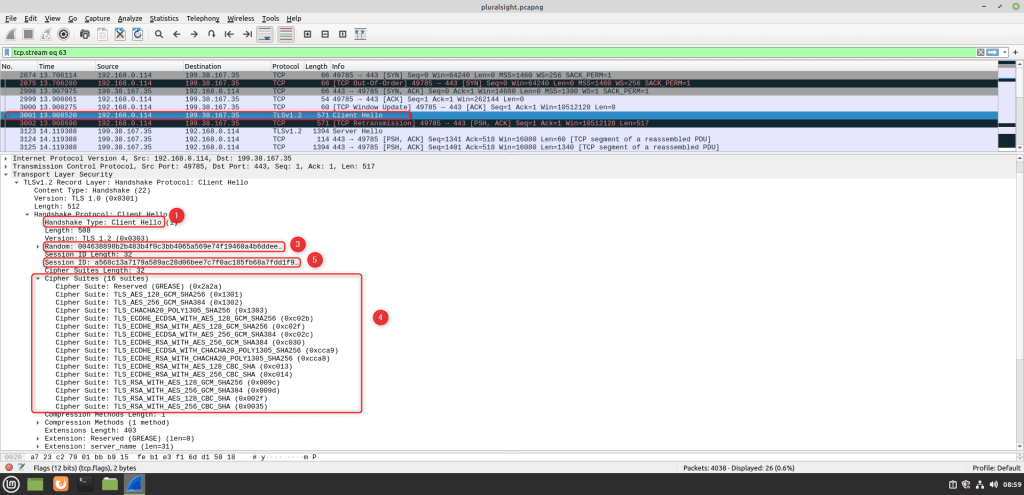
If you look at Wireshark, you will see a client hello packet right after the three-way handshake. You can also see the TLS version, 28-byte random number, all supported cipher suites, and session ID in the packet.
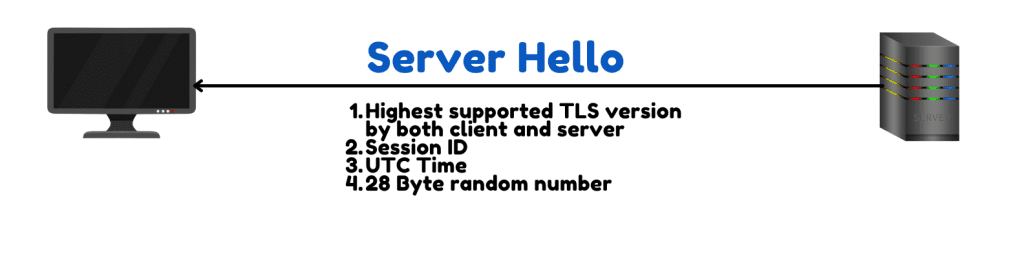
Step #2: Server Hello
After the server receives the client hello, it will examine the supported TLS versions and cipher suites sent by the client. And the server will select the highest supported TLS version by both client and the server. The server also includes the session ID, UTC time, 28-byte random number, and selected cipher suite in the server hello message and sends it to the client.
Wireshark Demo:

The next packet you will see after client hello is server hello.
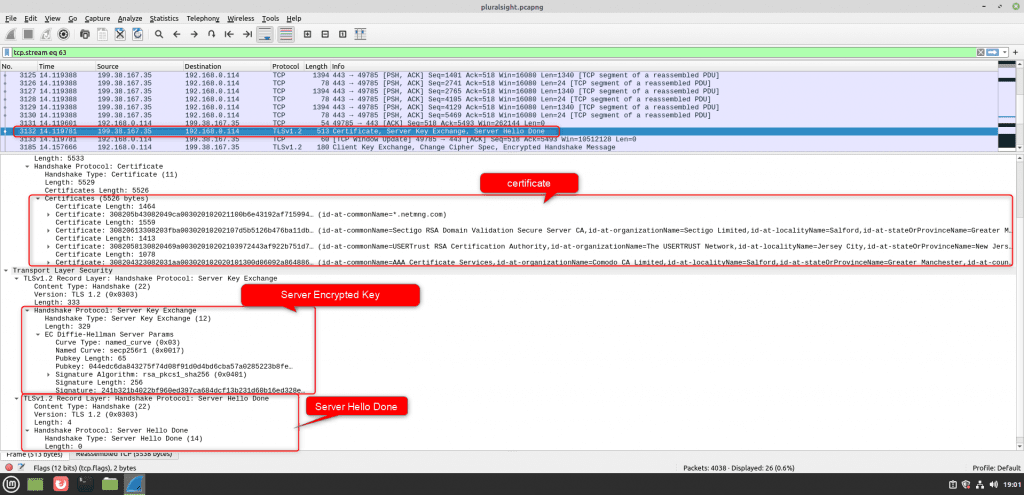
Step #3: Certificate, Server Encryption Key, and Server Hello Done
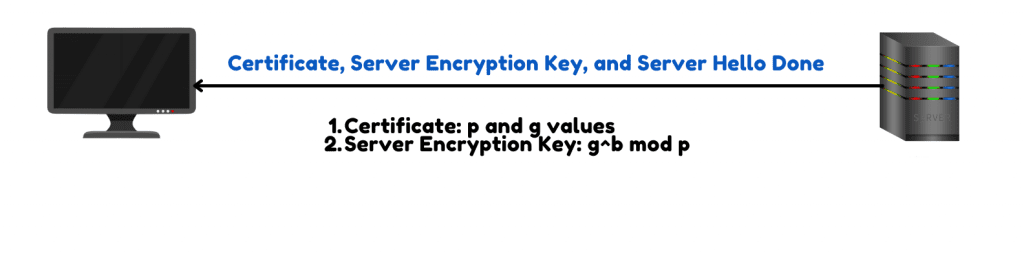
After sending the server a hello message. The server will send the certificate, which has p and g values used in the key exchange process, server encrypted key, and server hello done message to the client.
Step #4: Client Encrypted Key, Change Cipher Spec, and Finished

After the client receives the server encrypted key. It will respond with the client encrypted key. It also sends change cipher spec. What it means is that it has enough information to start encrypted communication, and it is going to send the data with encryption from now onwards. Till now, the communication was plain text. After this, communication will happen with encryption. After the server receives the change cipher spec message, it expects encrypted data from the client.
See Also How To Protect Your Android Device From The New DawDropper Banking Dropper?

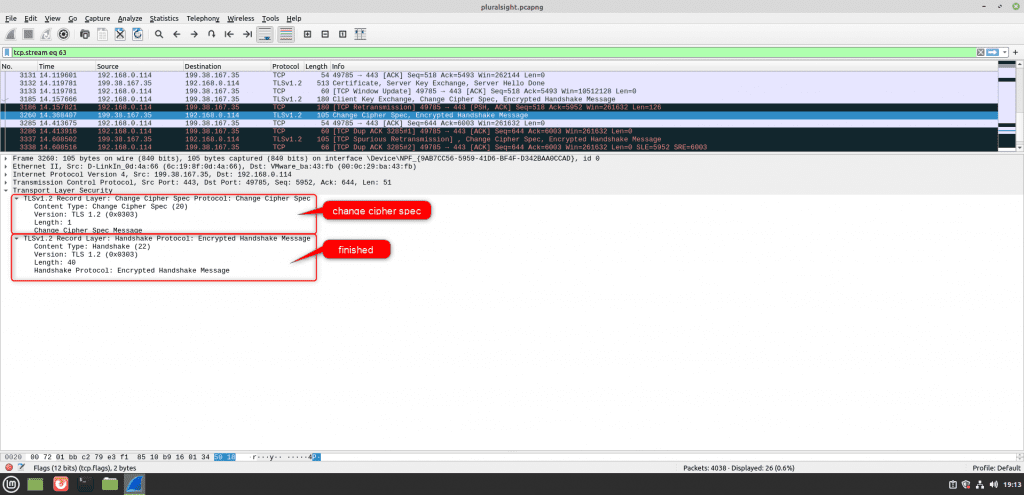
Step #5: Change Cipher Spec And Finished
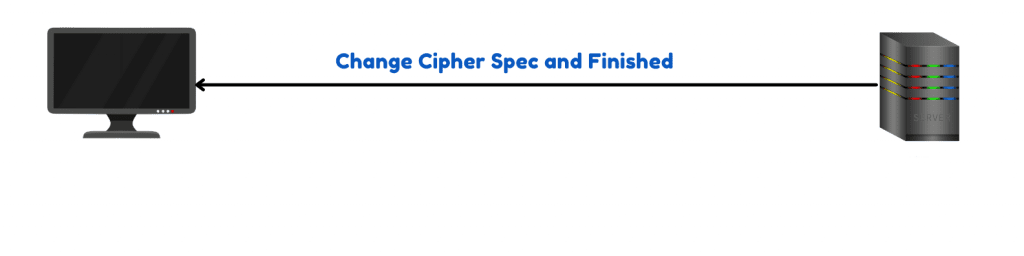
This is going to be the last message that the server is going to send, which includes change cipher spec and finishing the message. This indicates that all feature messages are going to be encrypted.
This completes the process of the TLS v1.2 protocol handshake process.


