A Certificate Authority is an entity in PKI whose responsibility is to issue, revoke, and maintain the database of digital certificates used to prove the identity of the object over a public or private network. Public CAs (Certificate Authority) are predominantly used to verify the identities of the websites and other web services. However, medium to large size organizations uses their own private CAs on their internal network to secure their network infrastructure. This post will guide you how to set up a Certificate Authority on Ubuntu using a built-in utility called OpenSSL. We also cover how to create a CSR (Certificate Signing Request) and issue a certificate on using your new CA for the CSR. Let’s begin.
What Is A PKI System?
Public Key Infrastructure, in short PKI, is a set of hardware, software, encryption technologies, and services used to create, manage, distribute, use, store and revoke digital certificates. The main purpose of the PKI system is to provide secure communication across the network by verifying the identities of legitimate resources.
What Is Certificate Authority?
A Certificate Authority is one of the main entities in PKI, whose responsibility is to issue, revoke, and maintain the database of digital certificates which are used to prove the identity of the object over a public or private network. The primary role of the CA is to digitally sign and publish a public key (certificate) bound to a given user, machine, application, and entity.
Note: PKI is itself often used as a synonym for a CA implementation. Moreover, the term trusted third party (TTP) might also be used for certificate authority (CA).
What Is OpenSSL?
OpenSSL is a robust, commercial-grade, and full-featured software library which offers Transport Layer Security (TLS) and Secure Sockets Layer (SSL) services for applications. OpenSSL can be used in various tasks. It can be used to create cryptographic keys (private and public key pair), it can use be used as a full-stack Certificate Authority CA to issue the requested certificates. Moreover, it can also be used to generate self-signed and code signed certificates too. However, In this post, You will learn how to set up a Certificate Authority using OpenSSL.
OpenSSL is an open-source and cross-platform application available for Linux, Windows, macOS, and BSD systems. You can set up a Certificate Authority on any platform on which you will have OpenSSL.
Prerequisites To Set Up A Certificate Authority On Ubuntu
The prerequisites required to set up a certificate authority are very minimal. You just need a physical or virtual machine running Ubuntu. Anyways, OpenSSL is included in the default packages, so you may not be required to install it. You can make sure of the installation of OpenSSL by checking its version command.
$ openssl version -a
See Also How To Mitigate The 3 0-Day Vulnerabilities In The NGINX LDAP Reference Implementation?
If in case you don’t see OpenSSL installed on your Ubuntu. Run this command to install OpenSSL on Ubuntu.
$ sudo apt install openssl
Procedure To Set Up A Certificate Authority On Ubuntu
How to set up a certificate authority on Ubuntu?
- Update the repository in UbuntuStart the process with repository and system upgrade.
$ sudo apt update && sudo apt upgrade
- Install NTP on UbuntuRun this command to install NTP on Ubuntu:
$ sudo apt install ntp
You can see the list of NTP servers your machine sync with. Run this command to see the list.
$ ntpq -p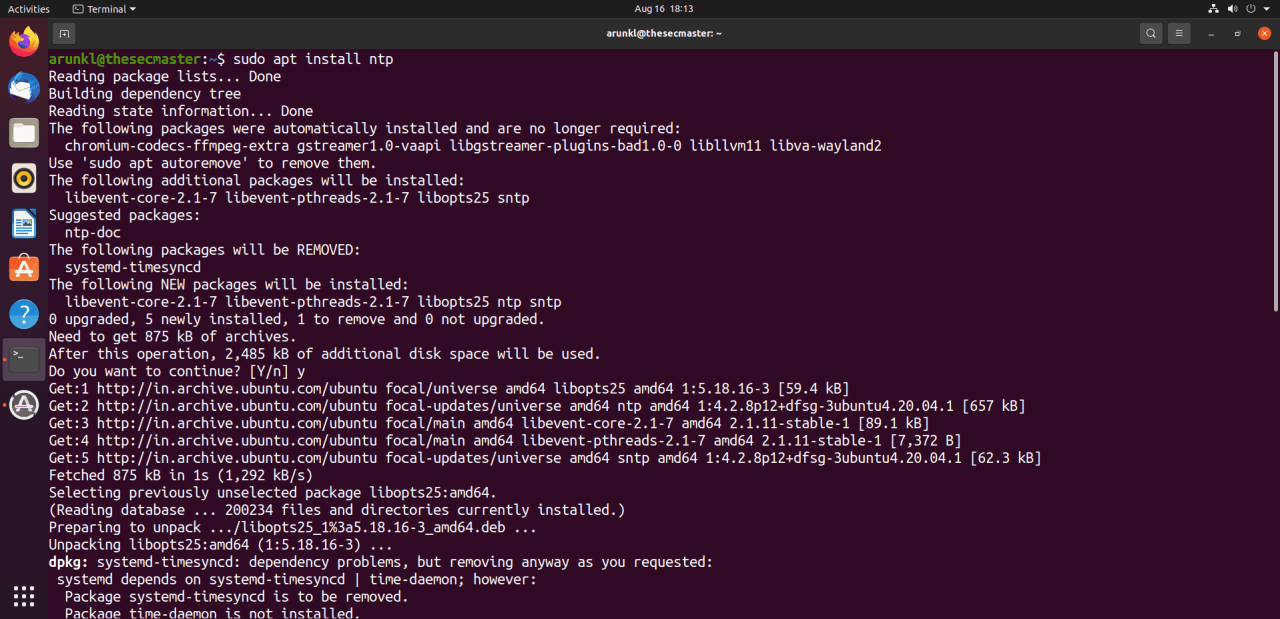
- Create files and folders to set up certificate authority on ubuntuIt is better to organize the new CA with dedicated folders. Let’s create some directories and files required to set up certificate authority on Ubuntu.
Create a directory that serves as the root directory for the CA.
$ sudo mkdir /root/ca/
Create five more directories underneath ‘ca’ directory.
Create ‘certs’ directory to store issued certificates.
$ sudo mkdir /root/ca/certs/
Create ‘CRL’ directory to store Certificate Revocation List.
$ sudo mkdir /root/ca/crl/
Create optional directory ‘newcerts’ to store new certificates.
$ sudo mkdir /root/ca/newcerts/
Create a directory ‘private’ to store private keys.
$ sudo mkdir /root/ca/private/
Create a dedicated directory ‘requests’ to store certificate requests or CSRs.
$ sudo mkdir /root/ca/requests/
Create ‘index.txt’ which act as a database for issued certificates.
$ sudo touch /root/ca/index.txt
Create an empty file named ‘serial’ which stores the next serial number of the certificate. Switch to superuser mode to create the file.
$ sudo su
# echo ‘1000’ > /root/ca/serial
or
# echo 1000 > /root/ca/serial
Note: Note that the value 1000 is a hexadecimal format, which is 4096 in decimal format.
At last, enable permission restriction on these files and folders so that only the owner can modify them.
# chmod 600 /root/ca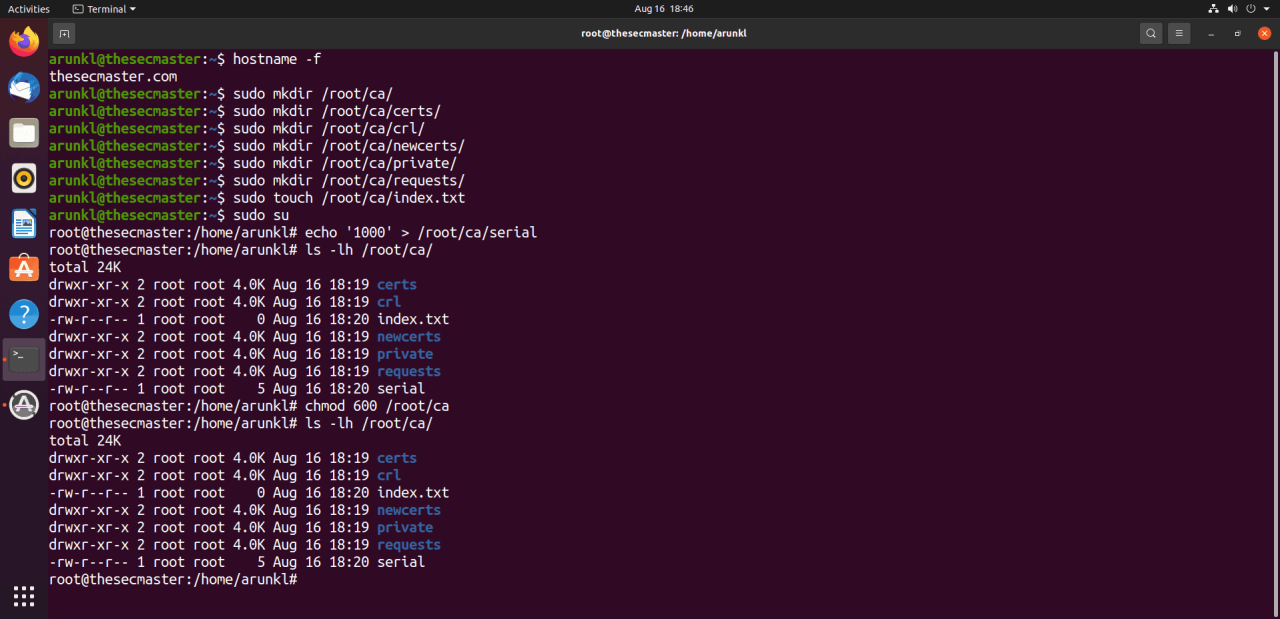
- Create a private of the CA’s certificate
Navigate to the ca directory.
# cd /root/ca/
Run this OpenSSL command to create a RSA private key cakey.pem of length of 4096 bits for CA’s certificate.
# openssl genrsa -aes256 -out private/cakey.pem 4096
Note: It asks to set a passphrase to secure the key. Use complex if you are working in production.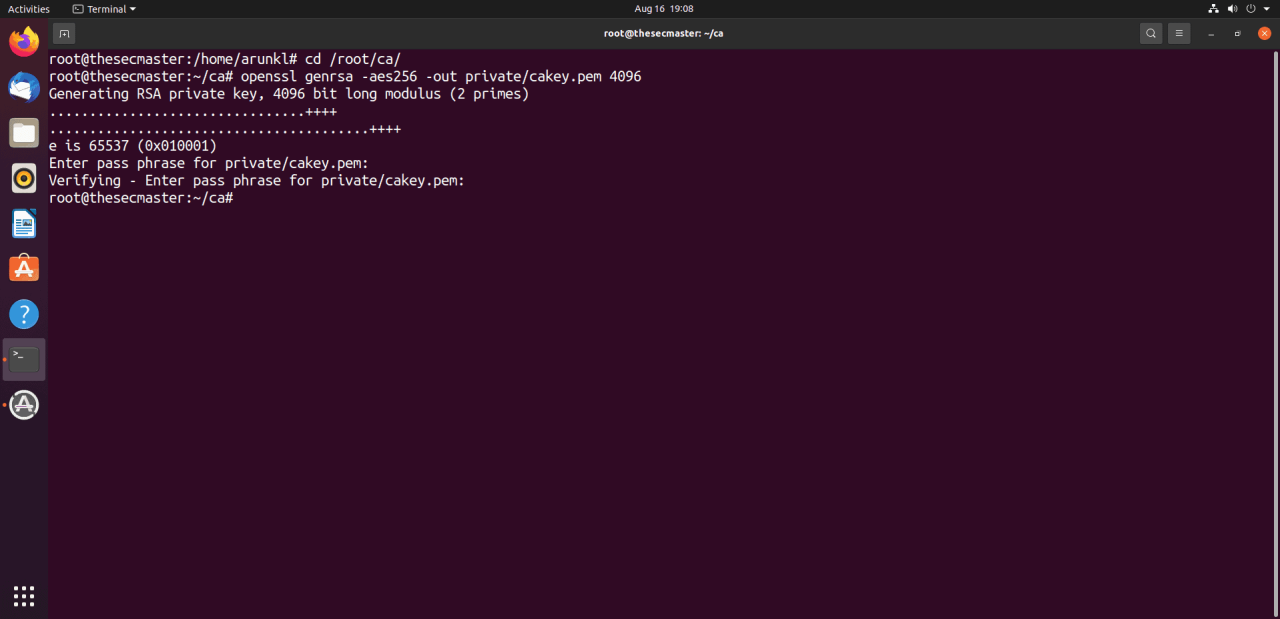
- Create a public certificate for the CA using the private key created in the previous stepRun this command to create a certificate that expires in 3650 days.
# openssl req -new -x509 -key /root/ca/private/cakey.pem -out cacert.pem -days 3650
It asks few details with the passphrase of the private key. Enter all the details to generate CA’s certificate. Make a note of the details. Because the same information is required to create CSR for other certificates.
ountry Name (2 letter code) [AU]:IN
State or Province Name (full name) [Some-State]:KARNATAKA
Locality Name (eg, city) []:BENGALURU
Organization Name (eg, company) [Internet Widgits Pty Ltd]:securitymaster
Organizational Unit Name (eg, section) []:IT-SECURITY
Common Name (e.g. server FQDN or YOUR name) []:securitymaster.dev
Email Address []:admin@securitymaster.dev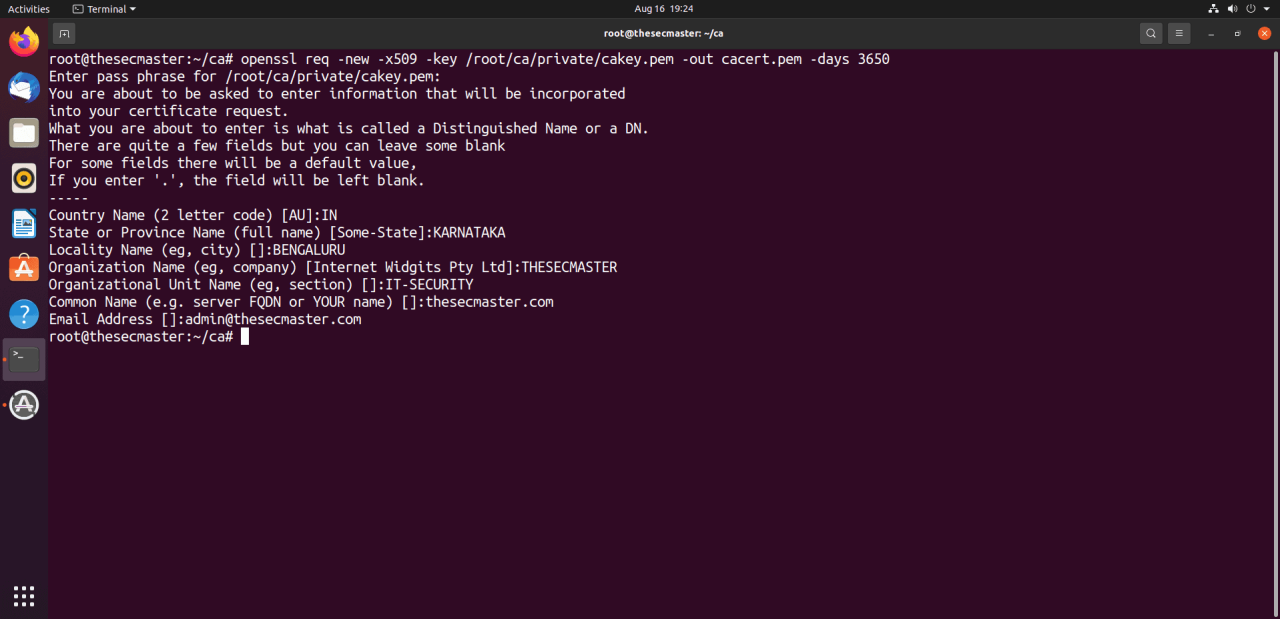
- Update the CA path in openssl.cnfopenssl.cnf is the file where you need to set the important configurations required to run the CA.
Open the configuration file using any text editor application. We are using nano text editor in the demonstration.
# nano /usr/lib/ssl/openssl.cnf
Scroll down the file to the [ CA_default ] section. Update the CA path.
[ CA_default ]
dir = /root/ca # Where everything is kept
- Other configurations in openssl.cnfYou can scroll down to verify other configurations. save the file Ctrl+o. Exit the file Ctrl+x.
This completes the procedure to set up Certificate Authority on Ubuntu. Your CA is ready to issue the certificates.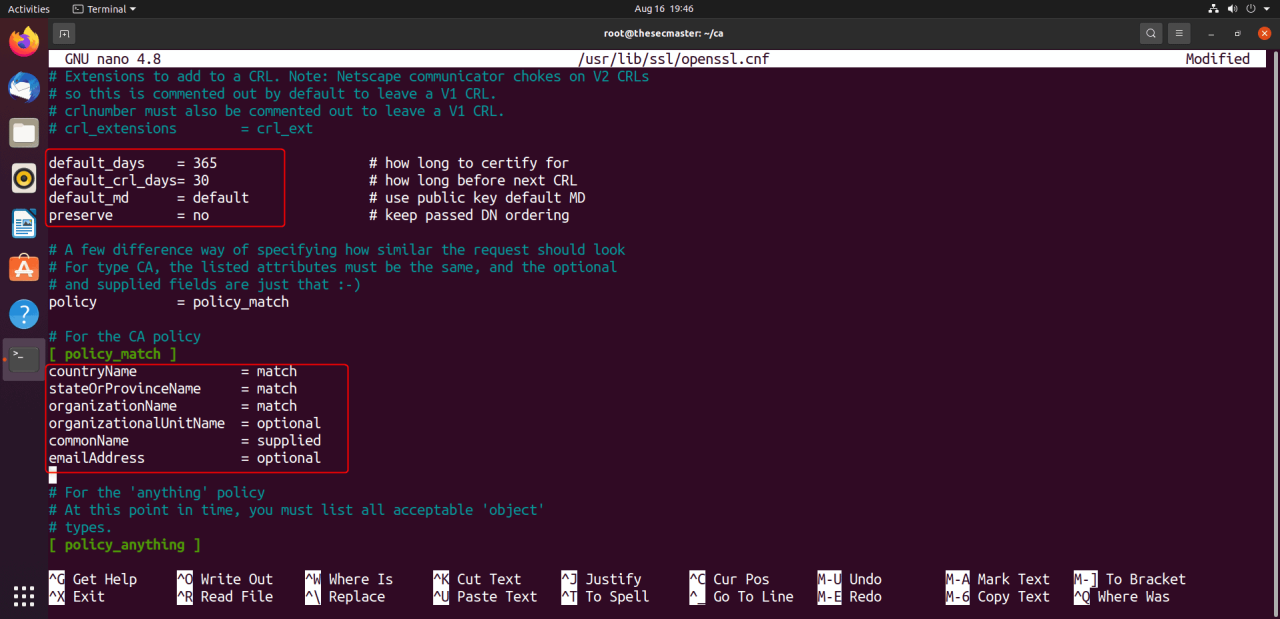
- Create a Certificate Signing Request for demonstrationThe private key is one of the must-have entities to create a CSR. The creation of a private key is included as a sub-process in the same command. Just use this command to create a CSR for the exampledomain.com domain.
# cd requests/
# openssl req -new -newkey rsa:2048 -nodes -keyout exampledomain.com.key -out exampledomain.com.csr
Let’s break down the command to understand.
openssl req: It denotes a new openssl request.
–new: New request
–newkey rsa:2048: It creates a 2048-bit RSA key
–nodes: It dosen’t encrypt the key which is not recommended. We are showing this just for demo.
–keyout: It takes the private key as an argument and send that key to the CSR file example.com.csr
–out: This writes the CSR to a file. example.com.csr in our demo
- Issue the certificate for the CSR created in the previous step.Command to issue the certificate.
# openssl ca -in exampledomain.com.csr -out exampledomain.com.crt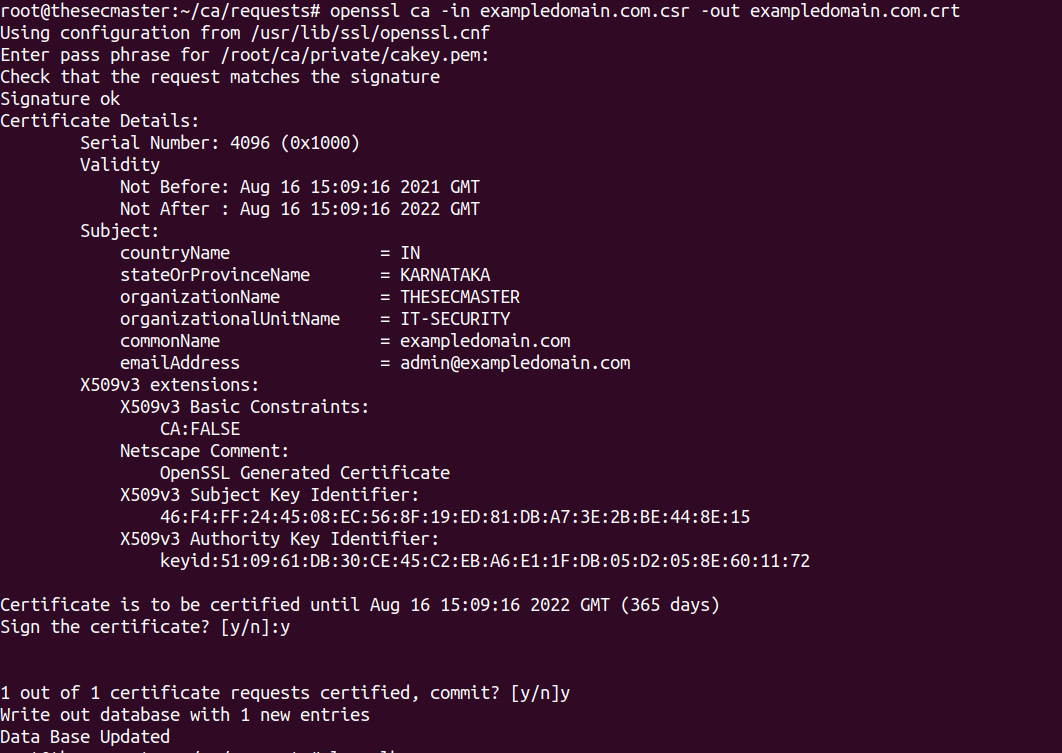
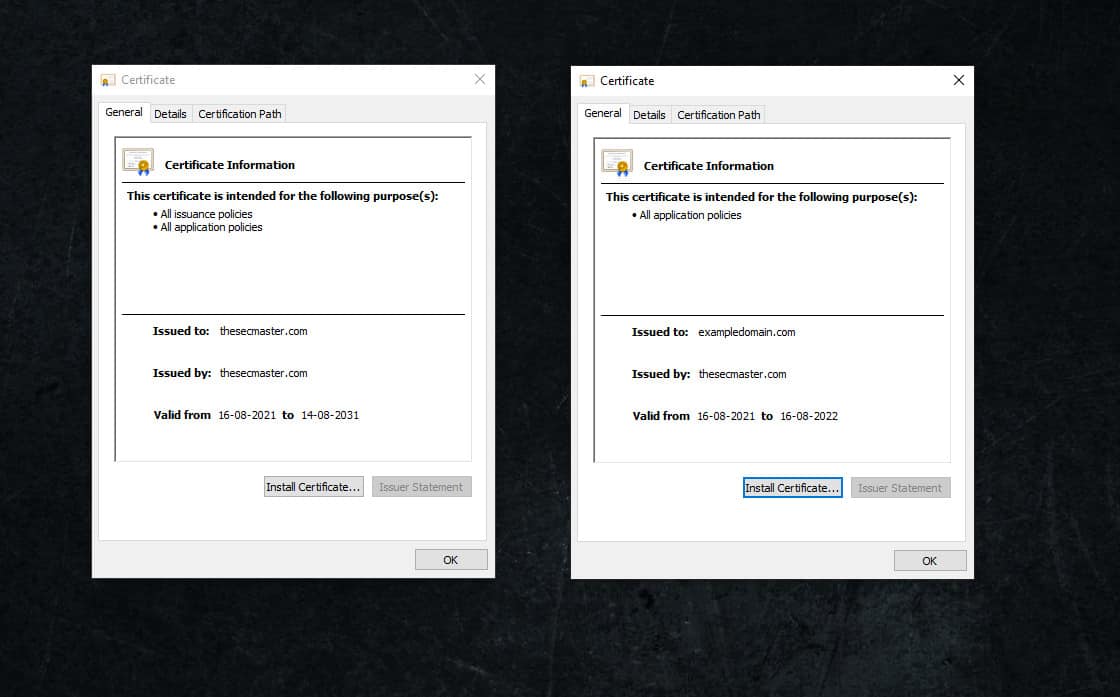
- Certificate issued for exampledomain.com
- .
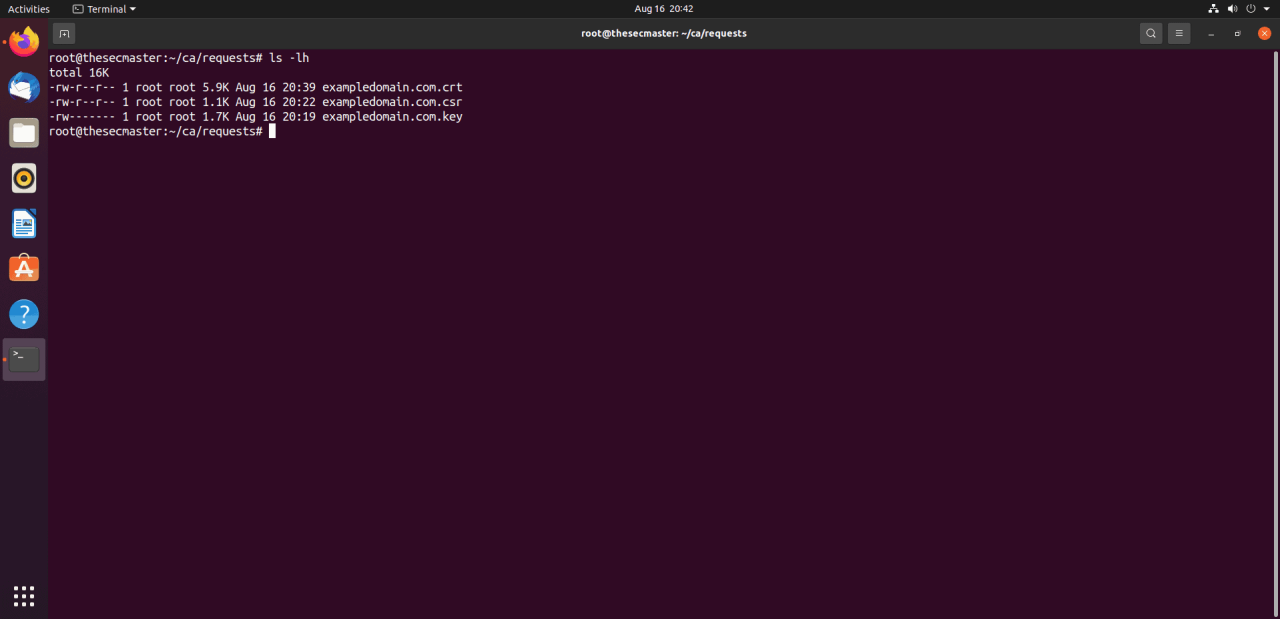
- rootca cerrificate and exampledomain certificateRootCA certificate is valid for 10 years. and exampledomain.com valid for 1 year.
Note: Certificates are not trusted on Windows machine as root certificate is not imported.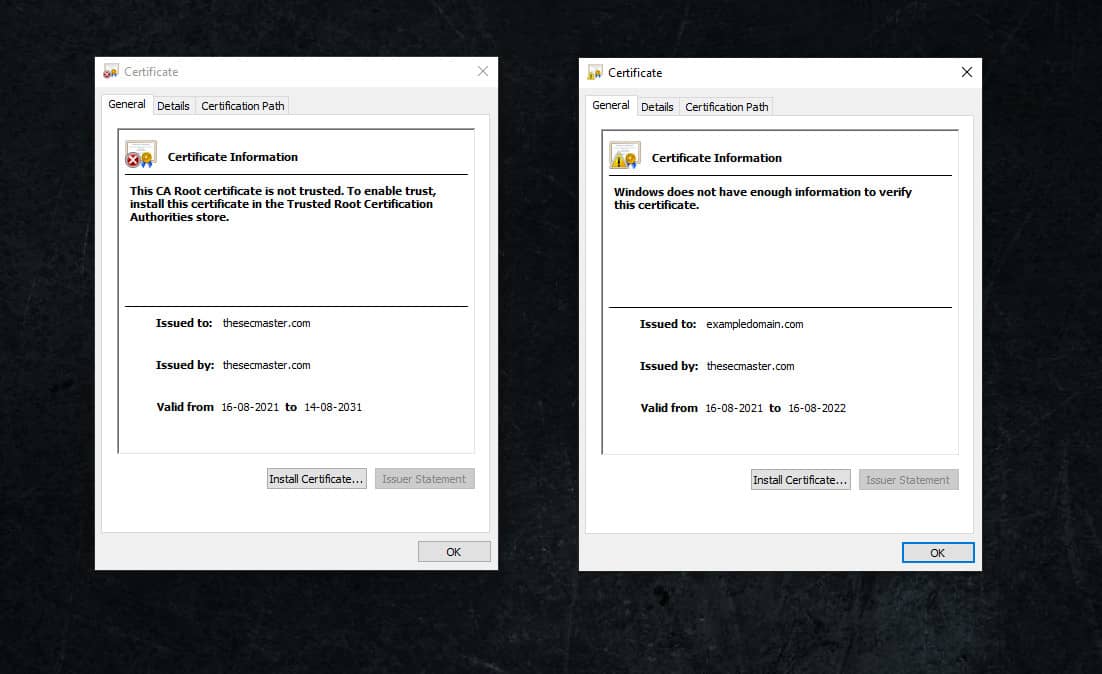
- Certificates after import on the Windows machine