
Linux security tools are essential for protecting your system and data from potential cyber attacks. That’s why all Linux administrators need to learn how to use them, regardless of their experience level.
In this article, we will explore some of the top Linux security tools and show you how to set them up. You will also learn about different categories of security tools.
Types of Linux Security Tools
Securing a Linux system requires a multi-layered approach that involves using a combination of different types of security tools. By understanding the purpose of each tool, you can select the right ones to protect your system from various security threats.
Antivirus
One of the most crucial types of Linux security tools for protecting your system against malware is antivirus software. These tools use a combination of signature-based detection and behavioral analysis to identify and remove malicious software. Some popular antivirus tools for Linux include ClamAV and Bitdefender.
Firewall
Another essential component of any security system is a firewall. Firewalls work by monitoring and controlling incoming and outgoing network traffic to prevent unauthorized access to your system. Linux offers a variety of firewall tools to choose from, including UFW and firewalld.
Intrusion Detection System
Intrusion Detection Systems (IDS) are designed to detect and alert you to any attempts to breach your system. They monitor network traffic, system logs, and other activity for suspicious behavior. Some popular intrusion detection systems for Linux include Snort, Suricata, and OSSEC.
Vulnerability Scanner
Vulnerability scanners are used to identify potential security vulnerabilities in your system. They scan your system for known vulnerabilities and provide information on how to patch or remediate them. Some popular vulnerability scanners for Linux include OpenVAS, Nessus, and Nikto.
Network Monitoring Tool
Network monitoring tools are used to monitor network traffic and identify any suspicious activity. They capture and analyze network traffic to provide insights into network performance, security, and troubleshooting. Some popular network monitoring tools for Linux include Wireshark and Ntop.
Best Linux Security Tools
Now, let us take a look at some of the best Linux security tools available today. They are all easy to set up and free to use. You will learn to install and use them to your advantage.
Note: Some tools will require that you first install the EPEL repository. You can do this using the following command.
sudo dnf install epel-releaseNmap
Nmap is a network exploration and security auditing tool. It can be used to scan networks and hosts to identify open ports, running services, and potential security vulnerabilities. Nmap can also be used to perform various types of network mapping, such as topology discovery and OS detection. It is easily one of the best Linux security tools.
Here is how to install Nmap.
1. Install Nmap.
sudo dnf install nmap
2. Run a test.
nmap google.comClamAV
ClamAV is an open-source antivirus engine that can be used to detect and remove malware from Linux and Windows systems. It is designed to be fast and efficient, and it can scan files, directories, and email attachments for known viruses and malware. Clamav can also be used to scan incoming emails for viruses and malware.
See Also How to Auto Block Macros in Office Documents Downloaded From the Internet
Here is how to install ClamAV.
1. Install ClamAV.
sudo dnf install clamav clamd clamav-update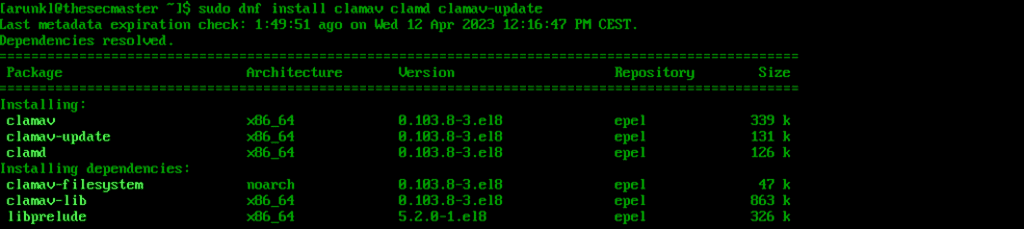
2. Adjust for SELinux.
sudo setsebool -P antivirus_can_scan_system 1
3. Configure scan.conf and freshclam.conf.
Open /etc/clamd.d/scan.conf and uncomment the LocalSocket parameter by removing the # symbol at the beginning. Make sure the Example parameter has a comment next to it.
4. Update signatures.
sudo freshclam
5. Create a service.
Now create a systemd service for ClamAV in /usr/lib/systemd/system/freshclam.service. Add the following code to the file.
[Unit]
Description = ClamAV Scanner
After = network.target
[Service]
Type = forking
ExecStart = /usr/bin/freshclam -d -c 1
Restart = on-failure
PrivateTmp =true
[Install]
WantedBy=multi-user.target
6. Activate and enable ClamAV.
sudo systemctl start clamd@scansudo systemctl start freshclamsudo systemctl enable clamd@scansudo systemctl enable freshclamWireshark
Wireshark is a real-time network protocol analyzer that can collect and analyze network traffic. It is useful for diagnosing network problems, troubleshooting performance challenges, and investigating security events. Wireshark can dissect and decode a wide range of network protocols, including HTTP, DNS, and SSL.
Here is how to install Wireshark.
1. Install Wireshark.
sudo dnf install wireshark wireshark-cli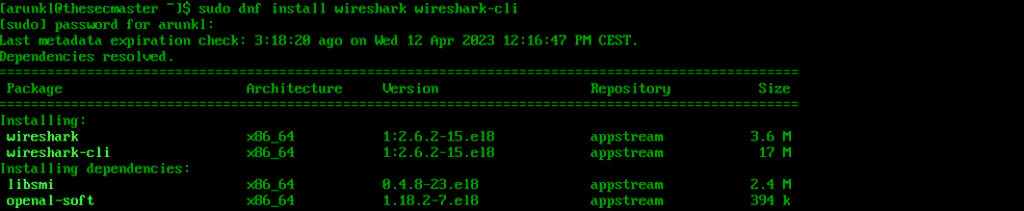
2. Verify the installation.
wireshark -vUse the official documentation or man pages to learn more about the tool. Here are some example commands.
Capture traffic on a port.
wireshark -f "port 80"Capture traffic from an IP.
wireshark host 192.168.5.10Display captured packets in real-time.
wireshark -kSQLMap
Sqlmap is an open-source penetration testing tool that automates the process of detecting and exploiting SQL injection vulnerabilities in web applications. Sqlmap can detect and exploit various SQL injection techniques, such as Boolean-based, time-based, and error-based injections. It can also perform other advanced tasks, such as identifying the database version, enumerating the database schema, and even retrieving data from the database.
Here is how to install SQLMap.
1. Install and configure Snap Store.
sudo dnf install snapdsudo systemctl enable --now snapd.socketsudo ln -s /var/lib/snapd/snap /snap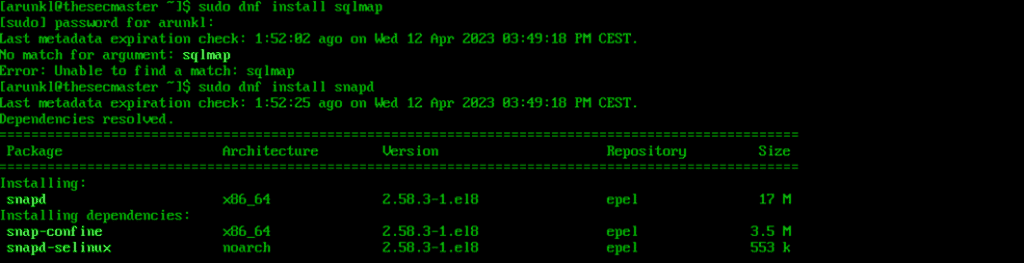
2. Install SQLMap.
sudo snap install sqlmap
Now you are ready to start using it, so read the official documentation to learn more. Here are some example commands.
Get help with basic usage:
sqlmap -hScan a URL for vulnerabilities.
sqlmap -u http://domain.comRetrieve database and table information:
sqlmap -u http://domain.com --dbs --tablesRkhunter
Rkhunter, also known as Rootkit Hunter, is a free and open-source security tool for Linux systems that scans the system for signs of rootkits and other malicious software. It performs checks on system files, directories, and critical files to detect changes and alert users to any discrepancies. Rkhunter also checks system binaries, configuration files, and other security threats, such as trojans, viruses, and backdoors, and can generate reports on any issues found.
Here is how to install Rkhunter.
1. Install Rkhunter.
dnf install rkhunter
2. Set the report email.
Update the MAILTO parameter in /etc/sysconfig/rkhunter with your email address.

3. Configure Rkhunter.
Update the database and system file properties.
rkhunter --updaterkhunter --propupd4. Run a scan.
rkhunter --c
Lynis
Lynis is an open-source security auditing tool. It can do a comprehensive analysis of the system to find security vulnerabilities, misconfigurations, and other issues. Furthermore, it offers actionable recommendations for improving the system’s security. Lynis is also well known for its ease of use.
See Also How to Deploy WordPress on VMWare Workstation?
Here is how to install Lynis.
1. Install Lynis.
sudo dnf install lynis
2. Run a system audit.
sudo lynis audit system
Check the official documentation to find more commands that you can use to take full advantage of this software.
SELinux
SELinux (Security-Enhanced Linux) is a security module that provides access control and security policies for Linux operating systems. It is designed to provide mandatory access controls that limit the actions of users and processes, even if they have gained root privileges. SELinux uses policy language to define what actions are allowed or denied for different processes and resources.
Note: The following steps are intended for users of distributions such as CentOS and HEL. Ubuntu users will need to follow a different procedure or consider AppArmour as an alternative.
Here is how to install SELinux.
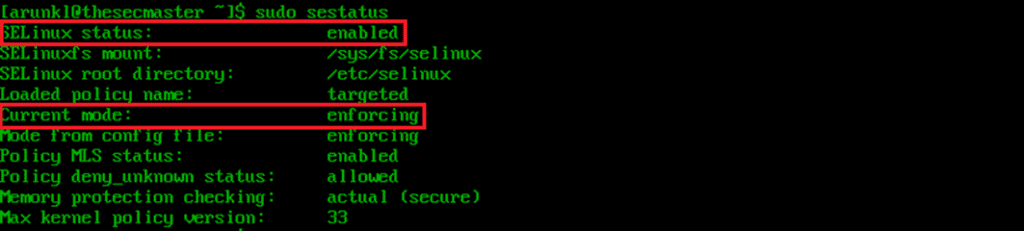
1. Check if SELinux is enabled.
SELinux comes preinstalled, so check if it is enabled.
2. Enable SELinux.
To enable SELinux, you need to edit its configuration file /etc/selinux/config and change the SELINUX value from disabled to enforcing or permissive.

Remember to reboot your server to apply the changes.
sudo reboot3. Set the right mode of operation.
SELinux can run in two different modes: enforcing or permissive. Enforcing is the default mode that applies the security policy to the entire server. Permissive mode, on the other hand, does not actually enforce the rules. Instead, it just logs any potential denials that the enforcing mode would give, making it better for testing purposes.
To check the currently active mode of operation and switch between them, you can use the following commands.

Firewalld
Firewalld is a firewall management tool for Linux operating systems. It provides a way to manage firewall rules and settings through a command-line interface or a graphical user interface. Firewalld uses zones to define different levels of trust for network connections, and it allows for the creation of rules that dictate how traffic should be handled for each zone.
Note: The following steps are intended for users of distributions such as CentOS and RHEL. Ubuntu users will need to follow a different procedure or consider UFW as an alternative.
Here is how to install Firewalld.
1. List the open ports and services.
Firewalld comes preinstalled. To start using it, check which services and ports are allowed to accept connections.
sudo firewall-cmd --list-all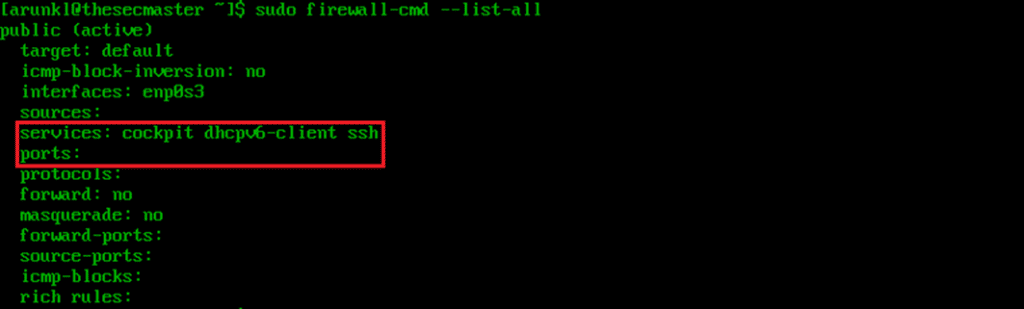
2. Configure the firewall to allow HTTP and HTTPS connections.
By allowing HTTP and HTTPS connections, you are opening your websites and apps to visitors. This is an essential step for production environments.
sudo firewall-cmd --zone=public --permanent --add-service=httpsudo firewall-cmd --zone=public --permanent --add-service=https
Finally, restart firewalld to apply the changes.
sudo firewall-cmd --reload3. Configure the firewall to allow all connections from specific IPs.
This step allows you to whitelist the IPs of any administrators or developers who frequently use the server. In turn, they never have to worry about getting blocked and losing access.
sudo firewall-cmd --zone=trusted --permanent --add-source=#.#.#.#
There are many other useful firewall rules and commands that you can use for CentOS security hardening. To learn more about them, read the firewalld manual pages.
See Also How To Fix The RCE Vulnerability In dotCMS (CVE-2022-26352)
As always, remember to restart firewalld to apply the changes.
sudo firewall-cmd --reloadConclusion
Protecting your Linux system is essential to ensuring the security and privacy of your data. The use of Linux security tools can help you stay protected against potential cyber attacks.
Related posts:
 Mastering Linux Security: Top Linux Security Tools You Should Know About
 The Ultimate Guide to Harden the Ubuntu Server- Linux Server Hardening
 What Is New in Kali Linux 2023.2? And, How to Upgrade Kali Linux to 2023.2?
 Exploring CyberChef: The Cyber Swiss Army Knife of Security Analysts (SOC Analyst)